Friday, February 21, 2014

Stir-Fried Rice Noodles with Veggies and Tofu

Should people eat more vegetables is now not a question anymore, but more and more people have joined this movement for their own reasons. Some people are vegetarians for religious reasons while others do this to help the environment, and still others do it for the health benefits. Whatever the reasons are, I believe that staying away from eating meat at least once a week is a good choice. Beans and mushrooms add fiber, good fats, and vitamins E, A, and B. Some vegetables and fungi, such as mushrooms, contain plant proteins that help free radical cleansing and anti-aging properties; therefore, eating a different kinds of fungi a day enhances health. Eating more green vegetables and exposure to the morning sun gives the body enough calcium, iron, and magnesium.
Our digestive system needs a chance to relax the same way that we need to stop working too hard occasionally. Many people are afraid that eating only vegetables will not provide enough protein that is needed to support our bodies, but many studies have shown that our bodies will be better off with different kinds of protein, such as tofu, eggs, nuts, and grains. All of these protein sources are easy to digest with less fat and plenty of fiber. During Buddhist celebrations, most of the temples will serve stir-fried noodles. They use Chinese egg noodles, glass noodles, or rice noodles. Each of them has a different texture and taste, but they are all good for making stir-fried dishes. My favorite one is the rice noodle, which is used in the recipe presented today. This recipe is simple to prepare and is loaded with protein and fiber. Another reason I love this dish is that I can clear out all the different kinds of leftover vegetables from my refrigerator. Feel free to put into this dish whichever vegetables are on hand.

Ingredients:
1 lb. rice noodles, cooked al dente as directed on the package
8 oz firm tofu, deep-fried, and sliced
Sauce:
1 tsp miso paste
1 tbs soy sauce
1 tsp mushroom sauce
1/4 tsp salt
1 tsp sugar
1/4 cup water
Vegetables:
1 carrot, shredded
A hand full snow peas
2 oz. fresh mushrooms – shitake, oyster, or your choice
1/2 cup celery, sliced
3 bok choy, cut into bite size pieces
2 cups bean-sprouts
1 cup red cabbage
1 cup white onions, sliced
4 shallots, sliced
2 garlic cloves, minced

Garnish with cilantro

Directions:
In a sauté pan, add 1/4 cup of peanut oil. Add the shallots and cook until crispy. Remove crispy  shallots. Reserve the shallots oil.
Bring pot of water to boil. Add some salt to the boiling water. Blanch red cabbages, snow peas, celery, and shredded carrot for 1 minute and quickly submerge the vegetables in ice cold water to stop the cooking and preserve the bright green color.
In a small bowl, mix the sauce and set aside.
In a wok, add the shallots oil. Add sliced white onions. Stir and cook until wilted. Add garlic and cook until fragrant (try not to burn the garlic). Add the mushrooms and cook for 3 minutes. Add the blanched vegetables and fried tofu to the mushrooms and the sauce. Quickly toss them together and remove from the wok.
Add some shallots oil into a wok. Add noodles and toss the noodles in the wok for 1 minute. Return all the cooked vegetables and tofu with noodles. Add bean sprouts and bok choy. Toss to combine and mix well. You need to taste and season with more soy sauce. Remove from heat.. Place the noodles on a serving plate and sprinkle with cilantro, crispy shallots and crushed roasted peanuts (optional). Serve with some soy dipping sauce.


Thursday, February 20, 2014

Eggplant Stew with Ground Chicken

With many ways to cook with a Japanese eggplant, I am introducing another easy, one pot meal for a lazy day. This requires very few ingredients, but the taste is wonderful. It takes less than 30 minutes for dinner to be served.

Ingredients:
1 Japanese eggplant, cut into big chunks
1/2 lb. ground chicken
2 shallots, sliced
2 green onions, separated, (chop the white part, and cut the green part into 2 inch lengths)
1 tsp ginger
2 cloves garlic, minced
1 cup chicken broth
1 tsp oyster sauce
Salt, soy sauce, sugar, and black pepper to taste

Garnish with chopped basil and cilantro

Directions:
In a medium sauté pan, add 2 tablespoon oil, and pan-fry the eggplant until brown on both sides.

Remove and place into a stew pot.

 In the same sauté pan, add 1 tablespoon oil. Stir in shallots, chopped white part of green onions, ginger, and garlic. Cook until fragrant.

  Add ground chicken. Season with salt, soy sauce, sugar, oyster sauce, and black pepper. Chili flakes can be added at this point, if a spicy taste is preferred.

 Mix well and add to the eggplant. Add the chicken broth.

 Cover the pot and cook for 15 minutes. Re-season with salt or soy sauce. Sprinkle with green onions. Garnish with basil and cilantro. Serve.
 

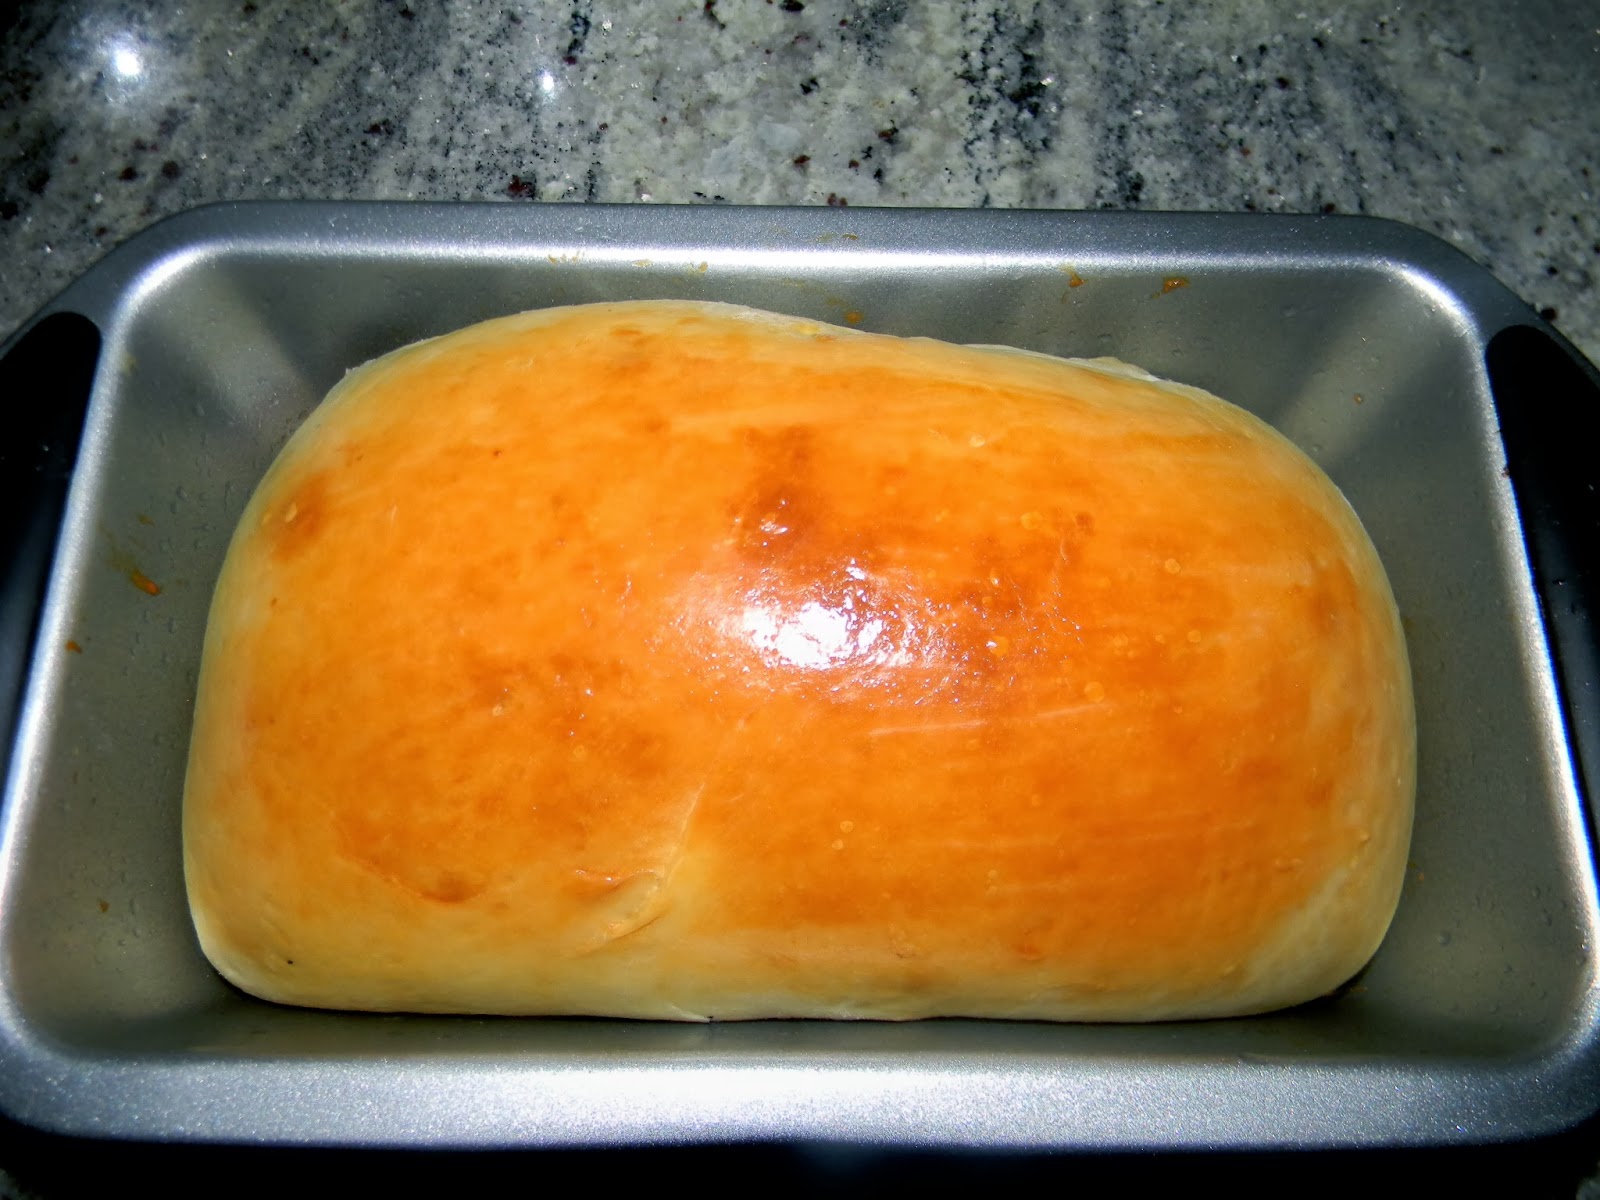
Raisin-Nuts Bread

I happen to know the recipe of Japanese milk bread using the Tang Zhong technique to make the bread very soft. I expanded the technique a little more by using the same recipe for basic dough and turned it into a different bread. The raisin-nuts bread is the one that turned out perfect. I have been making this bread since then, and every time I give this bread as a gift, I get so many compliments.

Ingredients:
Tang Zhong technique ingredients:
2 tbs all-purpose flour
1/2 cup water
Bread dough:
The Tang Zhong ingredients listed above
1/4 cup water
1 egg
1 tsp salt
2 tbs sugar
2 tbs coconut oil
2 1/2 cups bread flour
2 tsp active yeast
Filling:
1/4 cup brown sugar
2 tsp cinnamon
2 tbs coconut oil
1/4 cup raisins
1/4 cup chopped walnuts

Directions:
In a sauce pan, combine the Tang Zhong ingredients and cook until thickened. It is ready when a line can be drawn across , and they stay separated. Let it cool.


Place all the bread dough in a bread machine pan and press start. When the dough has finished kneading and has risen long enough, the machine will beep. Turn off the bread machine. Remove the dough and place onto a floured countertop, and let it rest for 5 minutes.

Combine all the filling ingredients.
Grease a 9” x 5” loaf pan and set aside.
Gently roll dough out into a 12” x 10” rectangular shape.

 Apply the filling onto the dough. Spread the filling over the dough. Starting with a 12 inch side, roll up dough over the filling.


 Fold dough from both ends to fit inside the loaf pan.

Place the folded dough seam side onto the greased loaf pan.

Cover with plastic or kitchen towel. Let dough rise until double in size. Brush dough with melted butter or an egg.

Preheat oven to 350° and bake for 25 to 30 minutes. Remove from oven, and let it cool before slicing and serving.


Tuesday, February 18, 2014

Chinese Squash Soup with Fish (Canh Bầu)

In every Vietnamese village, Chinese squash or as I prefer to call it, "Bầu", is a very beautiful image. This type of vegetable grows very well and easy to take care of. It is a climbing vegetable, and it needs a bamboo or wood structure to support it. Almost every household in the villages of Vietnam has been growing this vegetable because the bamboo structure to support this vine becomes a good place for the family to sit and relax under after a hot day at work. The young leaves of this vine can be sliced and stir-fried to create another dish for the family. It looks so beautiful when every vine had at least a few "Bầu " with a shiny bright green dangling under the support of its structure. In Vietnam, we called it " giàn bầu" with so many proverbs sung by the villages for generations. Bầu has many varieties of shape. Some are rough, some are long. The one shape of Bầu that always stays in my mind is round at the bottom with a long and narrow neck. It looks like the shape of a wine bottle, and this kind of shape is the image of a saint with a nice face and a long white beard. He became a fairy tale for all the Vietnamese kids when they grew up. Bầu can be cooked with meat or seafood, and the only two types of fish in Vietnam that can bring out the best of this vegetable soup are the snake head and the air breathing fish. The result is a clear broth with a yellow fish fat floating to the top. The cooked fish can be served on the side with fish sauce and hot chili. I cannot find this type of fish where I live, so I have to use trout instead. I know the taste will not be the same, but sometimes I have to make this soup to recharge my childhood memories. Also, this soup requires very few ingredients, and the health benefits are tremendous.

Ingredients:
1 Chinese squash
1 trout
Broth:
3 cups water plus 3 cups of vegetable broth
1 cup white onions, chopped
2 shallots
1 knob of fresh ginger, mashed
2 cloves of garlic, mashed
1 tsp salt
1 tsp fish sauce
1 tsp sugar
Garnish: chopped green onions and cilantro

Directions:
Clean trout very well and cut into 3 portions. In a medium pot, combine and boil the broth ingredients, except the vegetable broth.  Simmer the broth for 10 minutes and add trout. Skim of any residue rising to the top and cook trout for 5 to 7 minutes. Remove trout from the broth. Drain broth and discard the solids.
Peel the Chinese squash and shred.


 In the same pot, return the broth to the pot and add 3 cups or more of vegetable broth or water. Bring to boil and add the squash. Season with salt, black pepper, and fish sauce. Slice two shallots and add into the broth.  Cook squash for 10 minutes. Ladle the soup into a serving bowl and sprinkle with green onions and cilantro.

Monday, February 17, 2014

Crispy Deep-Fried Eggplant

Tempura is another name to describe this dish and probably is familiar to most people with the seafood or vegetable tempura served as an appetizer in Japanese restaurants. My Vietnamese recipe has eggplant dipped in batter and deep-fried until golden brown and served with Vietnamese sweet and spicy dipping sauce. This dish can be served as an appetizer or as a main meal.  In Vietnam, eggplant can make so many good and simple meals for common people. When my family lived in Vietnam, we were very happy just to charcoal the eggplant and to dip it in a dipping sauce and to eat with a bowl of rice, which made the day for us, just like for many other poor families. Even though many Asian recipes include a range of many different kinds of vegetables for deep-frying to accompany the meat course, eggplant is a vegetable that makes a good tempura. I know that after consuming this wonderful tasty meal, I have to hit the gym!!

Ingredients:
One large Japanese eggplant
Batter:
1/2 cup Korean mix
1/4 cup rice flour
1/4 cup cornstarch
1/2 cup cold water
1 shallot, minced
1 garlic, minced
1 tsp ginger, minced
1 tsp sugar
1/8 tsp salt and black pepper
1/4 tsp cayenne

2 green onions, thinly sliced

2 cups oil for deep-frying

Directions:
Slice eggplant diagonally (1/3 inch thick slices) and soak in cold water for 15 minutes. Drain and dry the eggplant slices with a paper towel.

In a mixing bowl, combine all the batter ingredients and mix well. Adjust the water sold that the batter is thick like heavy cream

In a large deep pan, heat the oil until hot (about 375°). You can test the oil by dropping a tiny batter into the hot oil, and if the batter floats immediately on the surface, the oil is ready.
Dip only a few eggplant slices  at a time.

 After shaking off the extra batter, place the eggplant slices into the hot oil. Do not crowd the pan. Fry the eggplant slices until golden brown. Remove and place onto a paper towel to absorb some of the oil.


In a small pan, add 2 tbs oil until hot. Stir in the green onions, and add a pinch of salt.  Remove from heat.
Arrange the fried eggplant slices on a serving plate. Top with scallion oil and serve with Vietnamese dipping sauce.


To make Vietnamese dipping sauce:
2 tbs sugar
2 tbs fish sauce
2 tbs vinegar
2 or more tbs water
2 tbs lemon juice
Hot chili
Minced garlic
Adjust to your taste

Sunday, February 16, 2014

Stir-Fried Chayote with Eggs

There are many dishes that are in my memory about the time I still lived in Vietnam after 1975. The dish I will prepare today is one of them. It is the common people's dish, but it can be served for the upper class of Vietnamese people. This dish can be prepared with beef or shrimp. I remember my mother used to make this dish with pig's fat, and it is a common fat to use in the Vietnamese kitchens in Vietnam. Sometimes when she saved a little more money in her budget, then eggs would be added into this dish, and it was special to us kids.  I think this recipe is a comfort food for me every time I prepare it. It brings back a special time for me and my mother--the time that she and we kids had to live in a small house with the straw roof leaking and the raindrops falling into the sauté pan when she had made this for us. However, all these memories always remind me that I have to appreciate my life now more and more everyday. Even though I can afford to make chayote with beef or shrimp now, but this dish remains as a common and comfort food for me.

Ingredients:
Two chayotes, peeled and shredded
One carrot, peeled and shredded
2 eggs
3 shallots
2 garlic cloves, minced
3 green onions, sliced
2 tbs peanut oil
1/2 tomato slice (optinal)
Season with fish sauce or salt, sugar, and black pepper


Garnish with basil and cilantro


Directions:
Break eggs into a bowl and season with some salt and pepper.
In a sauté pan, heat oil. Add shallots and cook until fragrant. Stir in garlic and cook for 1 minute.

 Add chayote and carrots. Season with salt and pepper to taste. If too dry, add 1/4 cup of water.

 Cook on high heat for 5 minutes.

 Move the chayote to the side of the sauté pan. Add a little oil and pour eggs into the pan. Wait briefly until the eggs just settle and then scramble them.

Rejoin the chayote with eggs and mix well. Add tomato and cook for 2 minutes.


Add the green onions and turn the heat off. Place onto a serving plate and garnish with basil and cilantro.
 

Saturday, February 15, 2014

Stir-Fried Chicken with Mushrooms and Snow Peas

One of my family’s restaurant favorite dishes was stir fried-chicken with mushrooms and snow peas. Even though the recipe may look like it has a long list of the ingredients, most of these ingredients are easy to find in most grocery stores. A good recipe is a starting point, but the techniques of cooking are another matter that needs practicing.   Most cooks will share the same feeling that making stir-fried dishes at home will not look like the dishes served in the restaurant, but that does not mean that a simple stir-fried dish cannot be prepared at home. Because the stir-fried dish needs extremely high heat and most household kitchens don't have this kind of stove, inexperienced cooks should not feel discouraged. As long as the cooks enjoy the process of making it from scratch with attention to details and love, they will have so much fun and satisfaction. Tasting good is the most important thing.

Ingredients:
1/2 lb. chicken or 1 large chicken breast, thinly sliced
Marinade:
1/4 tsp salt
1/4 tsp black pepper
1 tbs dry sherry
2 tsp cornstarch
4 oz  oyster mushrooms, or your choice of mushrooms,
2 oz. snow peas
Sauce:
1 cup chicken broth
1 tsp soy sauce
1/2 tsp salt
1/2 tsp sugar
1 tsp oyster sauce
1 tbs dry sherry
1 tsp cornstarch
Some spices:
1 tbs fresh ginger, minced
2 cloves garlic, minced
2 shallots, sliced
1/2 cup white onions, sliced
2 tbs of peanut oil

Garnish with green onions and cilantro

Directions:
In a small bowl, combine the marinade ingredients and add chicken. Mix well and let marinate for 15 minutes.


In another small bowl, mix all the sauce ingredients and mix well. Set aside.
Bring a pot of water to boil and blanch the snow peas and quickly submerge in cold water to preserve the bright green color. Drain.

After placing a sauté pan or wok over high temperature, add oil and swirl it around and add chicken in one layer.


Do not disturb the chicken until golden brown. Use a spatula to flip and cook the other side of chicken. Add ginger, shallot, garlic, and white onions. Stir and cook until the chicken is no longer pink and all the spices are fragrant. Add mushrooms and cook for 5 minutes.

 Add sauce and bring to boil. Add the blanched snow peas. Stir and mix them all to coat the sauce for 1 minute.


 Sprinkle with green onions and cilantro. Serve with hot cooked rice.

Friday, February 14, 2014

Honeycomb Cake (Bánh Bò Nướng)

My parents always said this to me, "Do not give up. Try and try until you succeed". I do not talk about anything that is so important, but making the honeycomb cake is the hardest cake that I had ever tried.  This cake is one of my childhood favorites and still is. I tried and failed so many times. I went to many websites to get some ideas and some famous chefs to help to prepare this cake, but there was still something that did not cause this cake to have the "honeycomb" appearance, as the name implies. However, I kept trying and finally today, which must be my lucky day, the honeycomb cake is perfect. I learned not to whisk the eggs too much, just enough for the yolk and white to become homogenized, sifted the flour twice, baked the pan until hot, and sprayed the oil just at the bottom of the pan. I love this cake because it brings me back the fond memory that I had when I was a young girl living in Vietnam. It has the simplest ingredients and directions, but I had no idea how it is so hard to achieve, until today.

Ingredients:
2 cups tapioca starch
1 cup coconut milk
1 cup sugar or 1/2 cup more
1 bag of baking soda
1 bag of vanilla sugar
1 tsp pandan extract
7 eggs
1 or 2 drops of green color (optional)
1 tbs butter or oil

Directions:
Preheat oven to 400° with the baking pan.
Cook coconut milk and sugar until the sugar dissolves. Remove from heat and add vanilla sugar, pandan extract, and food color. Let it cool.


Sift the flour and baking soda twice.
In a mixing bowl, whisk eggs slowly until homogenized and add the cool coconut milk onto the eggs.


Sift the flour into the coconut-eggs mixture. Whisk lightly until combined. Pour the batter through sieve to remove all the lumps.

Now the baking pan should be hot enough. Add 1 tablespoon of butter into the hot pan. Pour the batter through a sieve into the hot pan (some cooks say this guarantees the honeycomb effect). Turn heat down to 350° and bake for 45 minutes.


I did not remove the cake right away; instead, I slightly opened the oven door to let the cake cool a little longer in the oven. I think this is the best way to prevent the cake from depleting.